Thursday, April 28, 2011

New dress from old


I have really been wanting plaid dresses and pinafores recently, it has been tricky to find fabric I like as due to the earthhquakes, only one fabric shop has been open, and I am sick of looking at the same fabric choices. So I went to an op shop and bought plaid, lots of it :). It is actually cheaper buying fabric from op shops anyway. This was a skirt that had a broken zip up the side. It is a synthetic, very stretchy fabric.


I bought this blue fabric, not that it even matches the skirt, but I like them together anyway. The blue fabric is a stretchy synthetic too. I used New Look 6699 again, for the top piece, but put the zip in the side instead of the back.


I put a wee outie-pleat in the middle of the bodice as it was too big again. I really need to redraw that pattern piece so it fits well. Then I put buttons on he top to bring through the cream and maroon in the skirt.


Monday, April 18, 2011

Aspiring to have Joan's style

You know how I love Mad Men? Well I keep seeing the the 'Joan' character with these beautiful brooches. Some of hers are made of two parts. I keep seeing her wearing these...


Joan in her two part brooch

Another brooch Joan often wears


I was envious, I had to have one!! I have had a thing for brooches for a while, I tend to wear them more than other jewellery. Alas, when I went shopping the other day, I couldn't find any I liked, or any two part brooches. Then my friend T reminded me I could make one. Silly me, I should have realised that as I used to make jewllery-earrings and necklaces, etc,  I still have all the fastenings and they should be easy enough to make. We went in to a costume jewellery store and bought 3 necklaces for ten dollars. Bargain. These are what I bought.


Owls

Flowers

More flowers and fake pearls


To make them was easy, I grabbed my pliers and pulled off the pieces I wanted and reconnected them together how I wanted.


Yay, a two part brooch!

Yay, another two part brooch. My favourite.

I ended up using superglue  to join a jewellery-safety pin type fastener to each of the backs of the brooches. It was quick and easy to make them, and I love how they turned out. I still have heaps of leftover bits from the necklaces for future projects too :)


Lady Anne wearing my day's outfit

Thursday, April 14, 2011

My Peggy Dress


Who else has a big style crush on the outfits from Mad Men? I sure do. Normally I love Joan's outfits, and I would love it if my wardrobe emulated her characters wardrobe. Today, however, I made a Peggy dress.


I had been watching the show, and then I went fabric shopping, and miraculously without realizing came home with the same fabric as her dress. I had already bought the pattern, vogue 8667, as I have been crazy about 'wiggle dresses' since watching the show. Usually this a dress silhouette 'Joan' would wear, with the fitted bust waist, and pencil skirt.


 I have to admit, I thought it was a good idea to use check, but gee it is hard to match up the pattern, especially when I picked a pattern with lots of pieces. I think matching prints is an i.q. test now. I had also bought the fabric, which is a flannel cotton, as I thought It would be lovely and soft on my skin, but this dress is fully lined, haha, so it could have been as scratchy as I wanted. I have to also admit, I haven't used a vogue pattern, or fully lined anything before, and the instructions made no sense to me in places, so I kind of just went with my own thing. And who can tell? Hopefully only me. When in doubt, overlock it and all will look better or stick a ruffle on to hide the mess. So I overlocked it a lot. :)


I tried to copy her poses, it was fun. Her dress has sleeves and buttons, and mine does not. Otherwise, we have the same fabric, dress shape and collar.

I plan to make this dress again soon, in a brighter colour. More mad men obsession is on the way soon....


Saturday, April 2, 2011

New brooch from leftovers

So in my last post from my lilac skirt makeover, I had some leftover fabric.

Today i will show you how to make an accessory from that. I got this idea off Suzannah at http://www.adventuresindressmaking.com. Using this link

Embellishing to cover stains--tutorial!


What you start with:


Step one: grab a small piece of cardboard, make a petal shape, cut it out. Use this as a template to draw lots of petals on the leftover fabric.


Step2: Cut out the petals, overlock them or zigzag the edges (this has the benefit of making the fabric less floppy, and fray less too.


Step 3: Sew the petals atop one another. I sewed four together, and then sewed another four on top.


Step 4: Find some awesome buttons. My flatmate gave me these a week ago, from her nana's collection. Vintage buttons are fun!! They are easy to get cheaply from thrift stores.


Step 5: Sew the buttons on top. I used two and sewed them on top of each other.


Step 6: stick a safety pin or two in the back and stick them to your shirt. Now you have a nice new accessory to go with your skirt. I have seen these before, with a hair tie or bobby pin sewn to the back so you can wear it in your hair instead. If you wanted to make it stronger, so the edges don't curl as much, you could always sew some backing or felt on the back to the petals when you overlock them.
Done!!!! :)

Lilac skirt makeover

Recently, I keep reading fashion magazines and they feature this gorgeous lilac-amethyst colour. It is a colour that suits me really well and I have been waiting for it to come out in stores. It has not made it out  much here in NZ yet, and the only other thing I have is that purple ruffle dress I made. However the other day thrift shopping, I found this skirt:


It is the perfect colour, but was mid ankle length, a couple of sizes too big and elastic waisted. Elastic waists might me comfortable, but they are not flattering on me, as they add  extra bulk to my middle. The dress was also not fitted, it fell straight to the ground. I wanted it to be more like the skirt in this pic...


image from fabsugar.com

So the changes to make: make it high waisted,  my size, and make it contour my body better

Step one. Remove elastic. I cut the fabric on the inner seam so no one will see, and took the elastic out. I should have ironed it now, but I am lazy. This is the outcome.


Just a smidge too big!!


Step 2. Take in the skirt. My skirt had a side seam, so I took all the excess out through the back. I turned it inside out and put on my mannequin, and unpicked the lining so it wouldn't get stuck in my new seam. I pinned the excess out through the back, trying to make it follow the contours of my mannequin's body, and made sure it joined the slit at the back as I didn't want to have to adjust that. I sewed along where I pinned. I resewed the lining back together, following my new seam. It meant I ended up with a triangle of skirt and lining as leftover. If my skirt had a back zip, I would have taken the excess out from the sides, trying to make sure I took it evenly from each side.

The leftover triangle. I have drawn on it, and will show you what to do with it next time
Step 3. Now I had to fit it to my waist as there was excess at the front. While the skirt was still inside out, I simply pinched either side of the centre front and put a pin in. I tried to make them in the same place on either side, and even length and width. It worked out well, but you could measure it if you liked. I ironed my new seam and darts flat. I was lucky, as by making it a high waisted skirt, it took the length to a flattering below knee length so I didn't have to adjust that.


What I wore: I am wearing a thrifted light blue patterned ruffle shirt
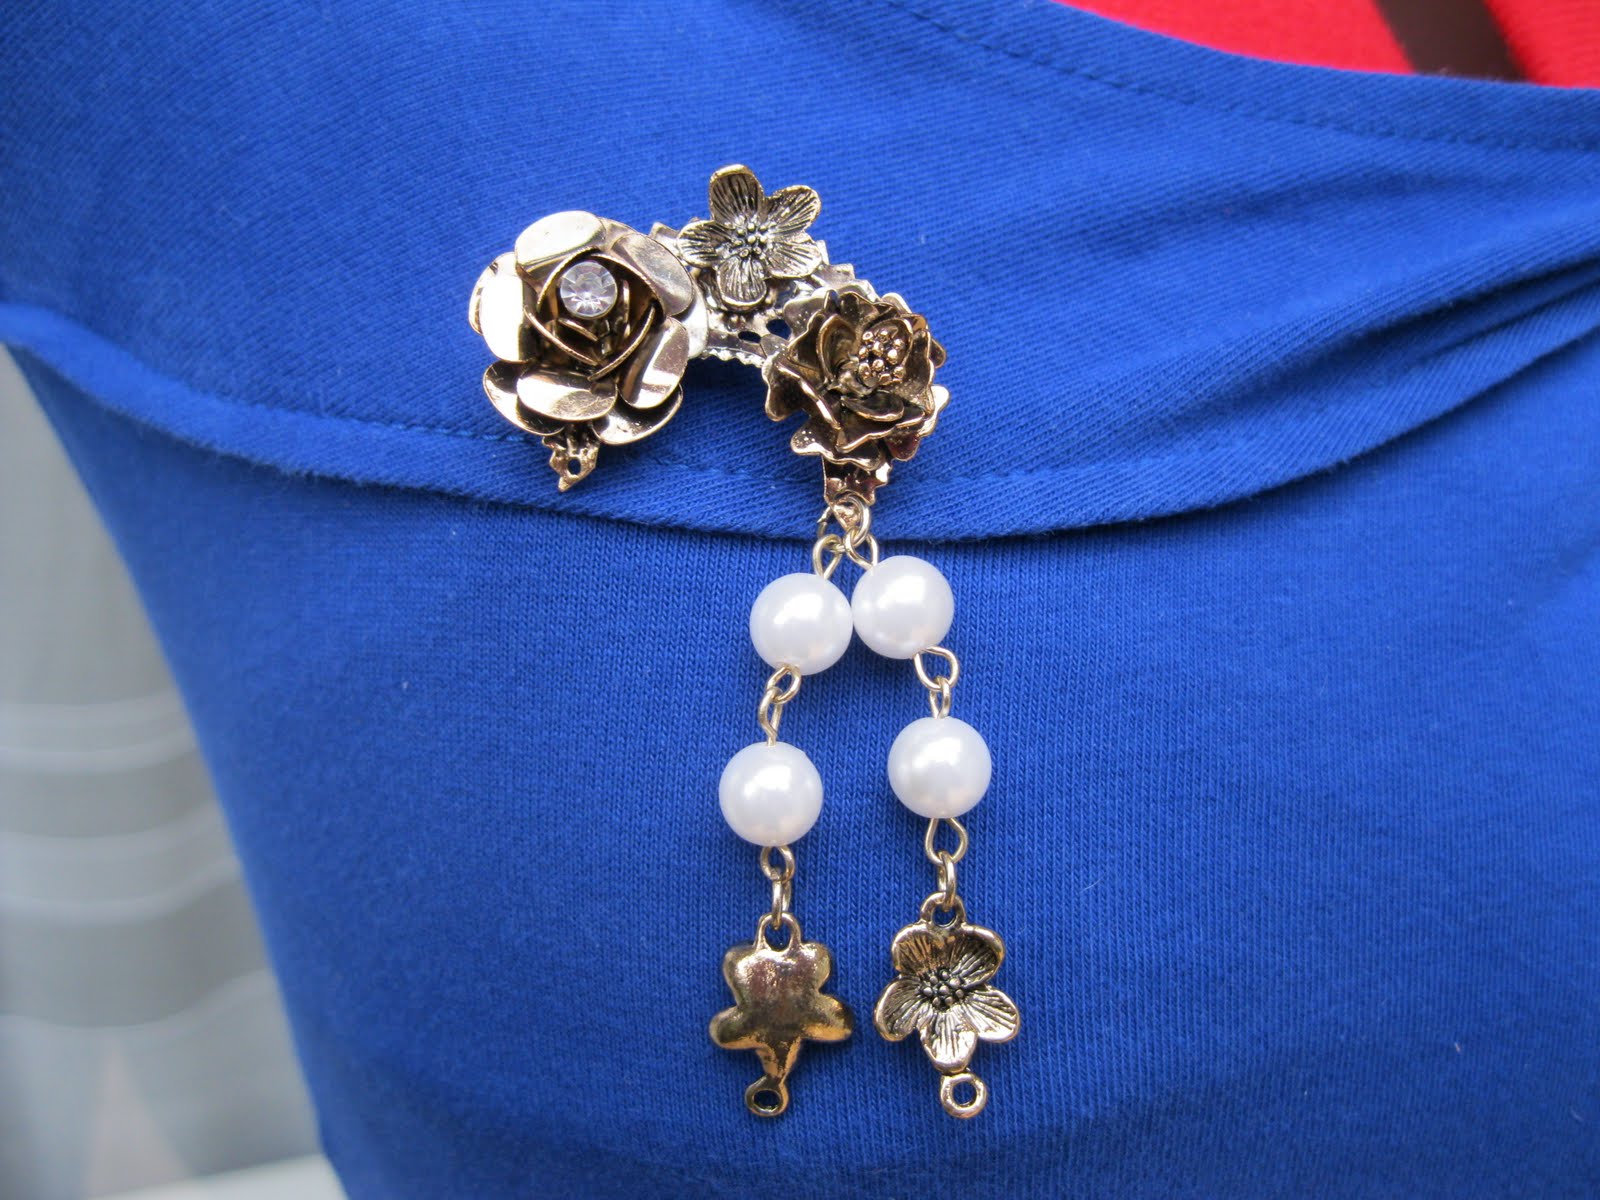
a brooch I will show you how to make in the next blog update
a sparkly hair clip I bought in China
a light pink belt that goes with a dress I bought from a thrift store
light pink pointy heels I bought on sale from the Shoe Warehouse.


  As I had raised the height, I also needed to check the back slit was not inappropriately high, but it was fine. I am lucky with that. My new skirt was done!! Next time I will tell you how I made the matching brooch I am wearing in the pictures. Now I am just dreaming of finding lilac patent leather heels. Have you seen any  in stores in NZ yet?


Friday, April 1, 2011

My second infinity dress

As my first attempt at the infinity dress was such a success, I decided to make another. This time I chose this fun patterned stretch jersey.

I am wearing my sixties inspired white boots.

It seemed like a good idea, until I started to make it. It was really stretchy and really heavy and rolled up at the edges, so was really tricky to cut straight. On my last dress, the raw edges annoyed me, so this time, for the bodice strips/ties, I doubled the width and sewed a seam down the length. This made a really long tube, which I turned inside out, and sewed it to the dress so the seam was hidden, and I was happy with not seeing the raw edges. Unfortunately, I was not happy with the extra bulk caused by doubling up the ties ( cos when it wraps around the waist, no girl needs extra bulk added there). This dress also sagged at the back, as the fabric was so heavy and stretchy, so to combat this, I added a thick piece of elastic around the waist and attatched it to the inner hidden waist band loop. This worked really well. However, I don't think I had folded my fabric evenly when I made the original skir,t as the hem is all uneven-probably due to the fabric being stretchy again. Oh well, not all projects will be a success. So if you are in NZ and want it anyway (knowing the issues with it), sweet as, first person who wants it, can have it. It will fit about a 10 to a 14. Otherwise, off to good will it goes :)